最近は人間からのメールは減り、機械からのメールが多くを占めるようになりました。その中にはメールを停止できなかったり、メール購読を義務付けられた酷いサービスもあります。
私は仕事もプライベートもインボックス・ゼロを実践しています。それもあって今まで Gmail の検索演算子 をチマチマと調べて、チマチマと設定していましたが、以前から全てを自分の管理下に起きたい欲求がありました。この度ついに強い衝動にかられたので、ゴリッと管理し始めました。
gmailctl を使うことにした
こちらの記事にも影響されて、私的には gmailctl が良いという結論に達しました。
Gmail filters as a code. Using gmailctl to create filters and…|by Hans Jakob Emmel|The Startup|Medium
最初は gmailfilters を試したのですが、既存の Gmail フィルターがほとんど消えてしまいました。本末転倒。つらすぎます…。(ToT)
Export や例外処理にバグがあるように見えました。
gmailctl の README.md Comparison with existing projects でも言及されている gmail-britta は Ruby 製で任意のコードを書けてしまうので、こちらも選択肢から外しました。
任意のコードを書けてしまうと、凝った設定をする可能性があります。今回は単なる設定に過ぎないので、Terraform の HCL のような宣言型で設定できる gmailctl を採用しました。作者が Google で働いていることも少し考慮に入れました。(^^)v
gmailctl の導入方法
$ gmailctl init のテキストナビゲーションに従います。Google の OAuth クライアントを作る必要がありますが、これが結構厄介でした。
$ gmailctl init
The credentials are not initialized.
To do so, head to https://console.developers.google.com
1. Create a new project if you don't have one.
1. Go to 'Enable API and services' and select Gmail.
2. Go to credentials and create a new one, by selecting 'Help me choose'.
2a. Select the Gmail API.
2b. Select 'Other UI'.
2c. Access 'User data'.
3. Go to 'OAuth consent screen'.
3a. If your account is managed by an organization, you have to
select 'Internal' as 'User Type' and Create (otherwise ignore).
3b. Set an application name (e.g. 'gmailctl').
3c. Update 'Scopes for Google API', by adding:
* https://www.googleapis.com/auth/gmail.labels
* https://www.googleapis.com/auth/gmail.settings.basic
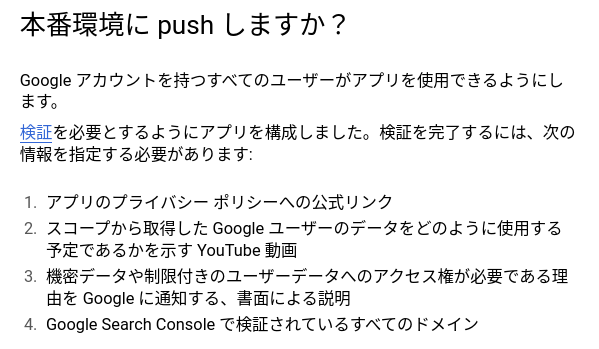
5. IMPORTANT: you don't need to submit your changes for verification, as
you're only going to access your own data. Save and 'Go back to
Dashboard'.
5a. Make sure that the 'Publishig status' is set to 'In production'.
If it's set to 'Testing', Publish the app and ignore the
verification. Using the testing mode will make your tokens
expire every 7 days and require re-authentication.
6. Go back to Credentials.
6a. Click 'Create credentials'.
6b. Select 'OAuth client ID'.
6c. Select 'Desktop app' as 'Application type' and give it a name.
6d. Create.
7. Download the credentials file into '/home/masutaka/.gmailctl/credentials.json' and execute the 'init'
command again.
Documentation about Gmail API authorization can be found
at: https://developers.google.com/gmail/api/auth/about-auth
Error: opening credentials: open /home/masutaka/.gmailctl/credentials.json: no such file or directory
一時的にでも GCP の言語を English にしたほうが上のナビに悩みづらいと思います。“Help me choose” の日本語訳が “ウィザードで選択” だなんて無理でしょ…。
私は gmailctl という GCP プロジェクトを作って、その中に OAuth クライアントを作りました。自分だけが使うので「公開」はしませんでした。↓ これは面倒すぎる…。
「認証情報」の JSON をダウンロードできるようになるので、~/.gmailctl/credentials.json として保存します。
もう一度 $ gmailctl init すると認可用 URL が出てくるので、ブラウザで開いて認可を進めます。Authorization code を取得できるので、コンソールに貼り付けて Enter で完了です。トークンが ~/.gmailctl/token.json に保存されます。
Go to the following link in your browser then type the authorization code:
https://accounts.google.com/o/oauth2/auth?access_type=offline&client_id=(以下略)
Authorization code:
gmailctl init のナビに書いてあるとおり、テストモードだと 7 日ごとにトークンが失効するので、再認可が必要になります。
gmailfilters の例ですが、ここまでの流れはだいたい同じなので、参考になるかもしれません。
最高すぎる!Gmail のフィルタ設定をデプロイできる CLI「gmailfilters」 - kakakakakku blog
あとは $ gmailctl download で設定を全部エクスポートして ~/.gmailctl/config.jsonnet に保存すればスタートラインに立てます。
Gmail のフィルター(や場合によってはラベル)は ~/.gmailctl/config.jsonnet の内容で全て置き換えられるのでご注意を。でも $ gmailctl diff で確認できますし、$ gmailctl apply で Yes/No を聞かれるのでそこまで危険ではないと思います。
gmailctl のルール例
ほんの一部です。
{
  // xxx カードの都度利用通知はそこまで重要でないと、ひと目で分かるようにする
  filter: {
    and: [
      { subject: 'xxx カードより「カードご利用のお知らせ」' },
      { from: '[email protected]' },
    ],
  },
  actions: {
    labels: ['notifications'],
    markSpam: false,
  },
},
{
  // xxx カードからの毎月のリボ払いのススメはウザいので全部削除
  filter: {
    and: [
      { subject: '【xxx カード】リボ・分割変更' },
      { from: '[email protected]' },
    ],
  },
  actions: {
    delete: true,
  },
},
{
  // xxx 新聞からのメールは多すぎてウザいので全部削除
  filter: {
    to: '[email protected]',
  },
  actions: {
    delete: true,
  },
},
{
  // このブログのデプロイ失敗通知を Pushover で受け取る
  filter: {
    and: [
      { from: 'heroku' },
      {
        or: [
          { subject: 'Automatic deployment of masutaka-net failed' },
          { subject: '[masutaka-net] Release phase command failed to execute' },
        ],
      },
    ],
  },
  actions: {
    archive: true,
    markRead: true,
    markSpam: false,
    forward: '[email protected]',
  },
},
Gmail の検索演算子は gmailctl の “query” operator で使えますが、私はそれは使わずに “and” や “or” operator を使うようにしました。Gmail 側のフィルターよりも、gmailctl のコードの可読性を重視しています。
gmailctl に任せると、フィルターの数が増えることはありますが、すっきりとした検索クエリに変換されることもあります。どちらにせよ、gmailctl を使うのであれば gmailctl のレールに乗ったほうが良いと思います。
便利関数の紹介
~/.gmailctl/config.jsonnet から import している ~/.gmailctl/gmailctl.libsonnet にはいくつかの便利関数があります。興味深かったので紹介しておきます。リポジトリの README.md にも言及があります。
chainFilters
Gmail のフィルターには if-else 構文が存在しない。この関数を使えば、前のフィルターに一致したら次のフィルターは適用させないことが出来る。
directlyTo
Gmail の検索演算子 to は cc や bcc にもマッチするそう。知らなかった。この関数を使えば、to のみにマッチしたフィルターを簡潔に書くことが出来る。
rulesLabels
存在していないラベルを rules が参照すると、gmailctl apply でエラーが発生する。この関数を使えばそれを回避出来る。ただ、gmailctl とは関係のないラベルも管理下に置く必要がある。
まとめ
gmailctl を導入して、Gmail のフィルターとラベルをコード管理しました。全てを手中に納めた気がして、とても良いです。心の平穏を得ることが出来ました。
- コード管理することで Git に履歴が残るので、要らなくなったフィルターを気軽に削除できる。戻すことも簡単
- Gmail のフィルターにはコメントを書けなかったが、~/.gmailctl/config.jsonnet には書ける
and や or の論理演算子と戯れるのも楽しかった。